KubeOps is a Web Application which can be used to easily handle clusters (like creation, installing apps, monitoring) and its various other related functions for various Cloud Providers like GCP, AWS, Azure etc. KubeOps Uses DataVision to monitor your cluster.
Use this documentation to learn how to use KubeOps and its various functionalities.
Current functionalities provided by KubeOps: –
- Create / Import / Delete Cluster on GCP
- Install / Update / Delete Applications on Cluster
- Install DataVision on cluster
- Monitor Cluster using Grafana
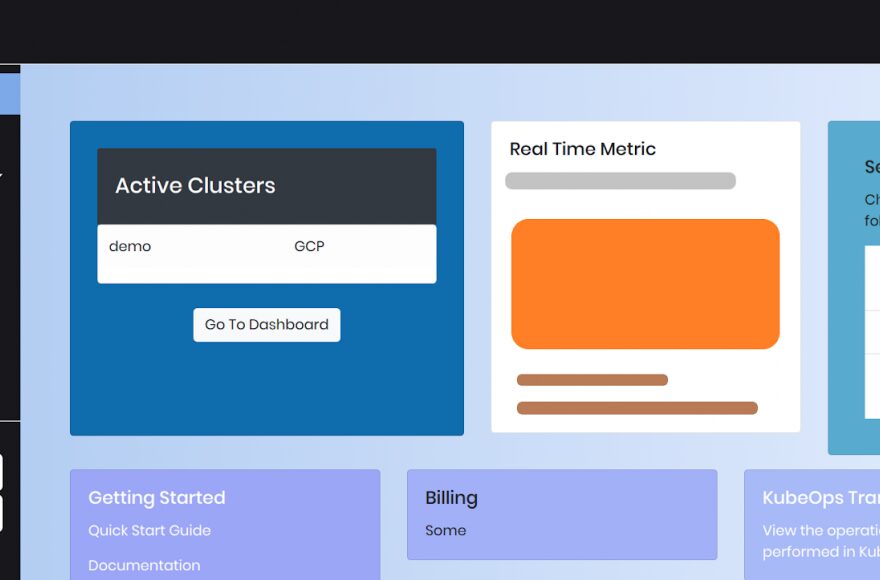
1. Getting Started
To use KubeOps, you need to sign on KubeOps web application on https://kubeops-280715.el.r.appspot.com/signup/
Or navigate to it by visiting our Website prismberry.com Under Services Tab, select KubeOps Now you are on the dedicated webpage on KubeOps
Click Sign Up to kick start managing and monitoring for apps and clusters.
2. Setting Up Cluster
This section is on how to create or import a cluster to KubeOps
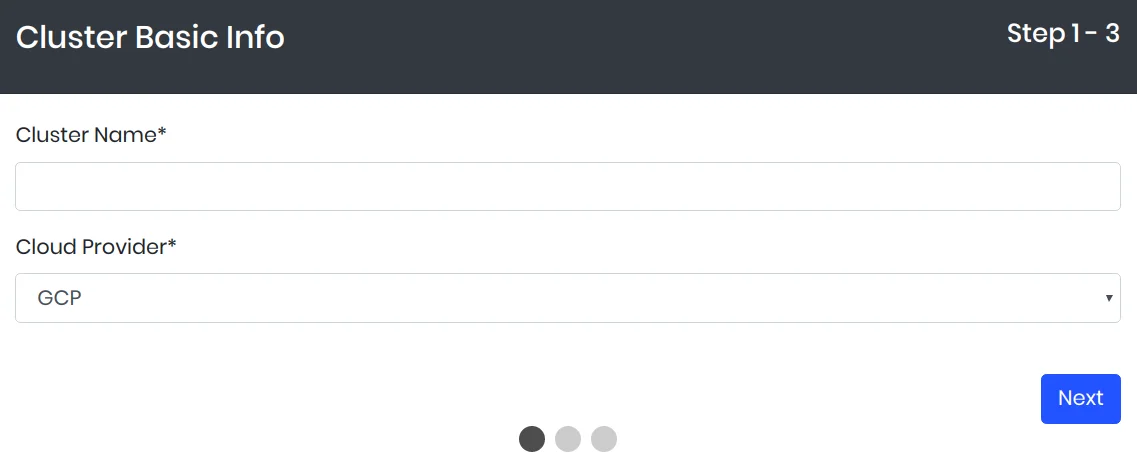
2.1 Create Cluster
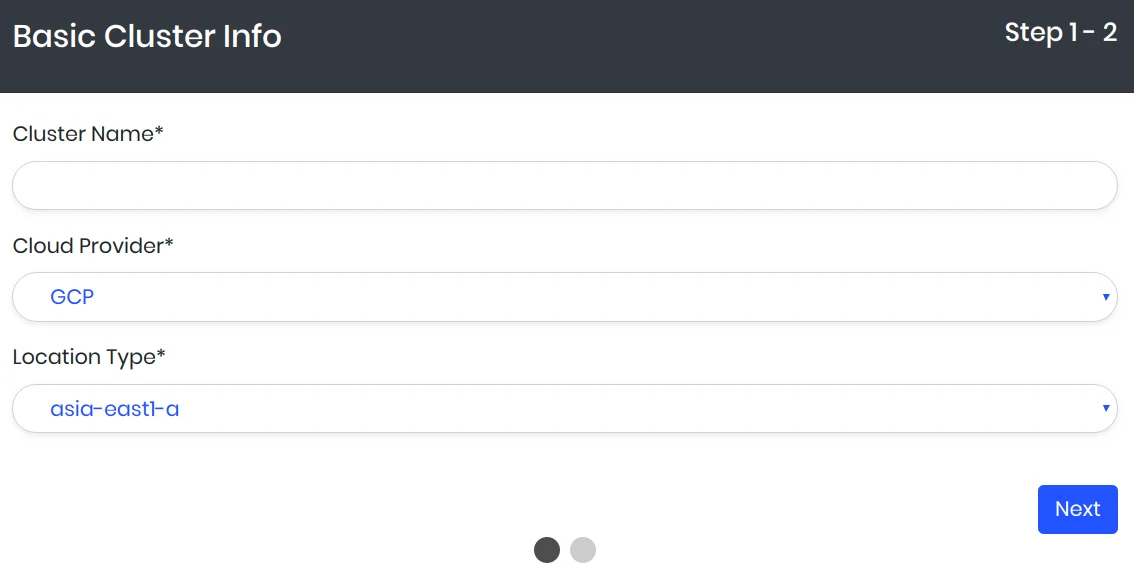
Step – 1: Basic Form (First Form)
- Enter Cluster Name*
- Choose your preferred Cloud Provider.
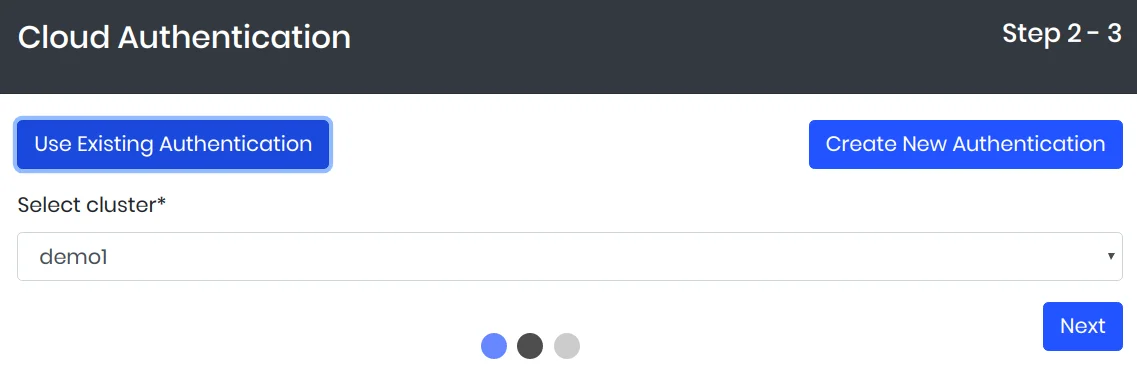
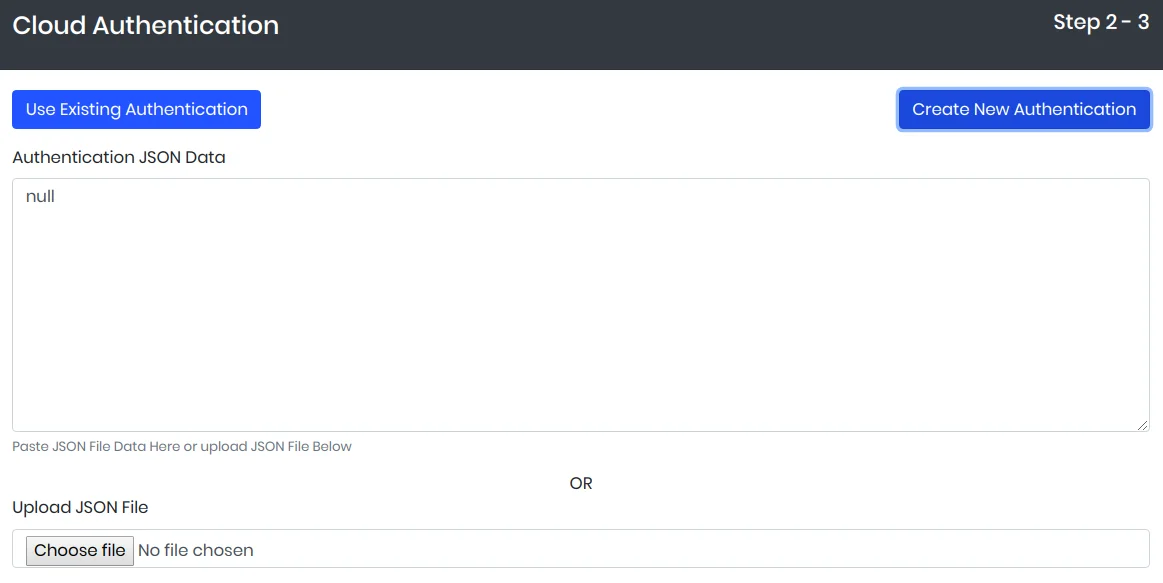
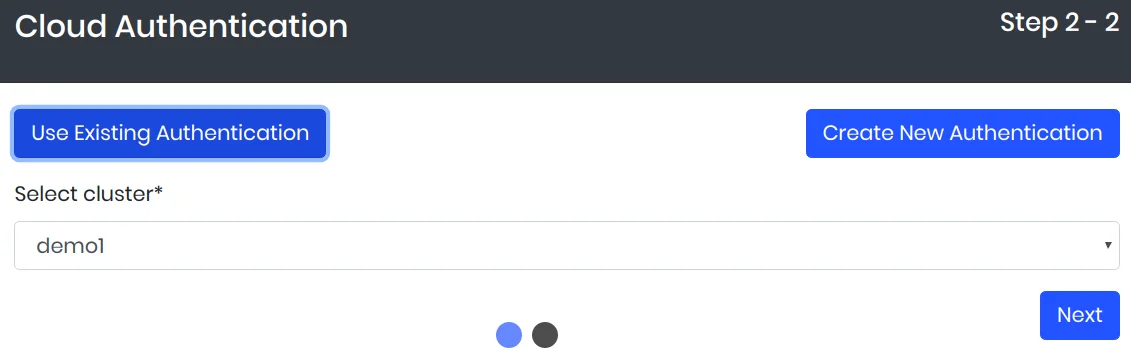
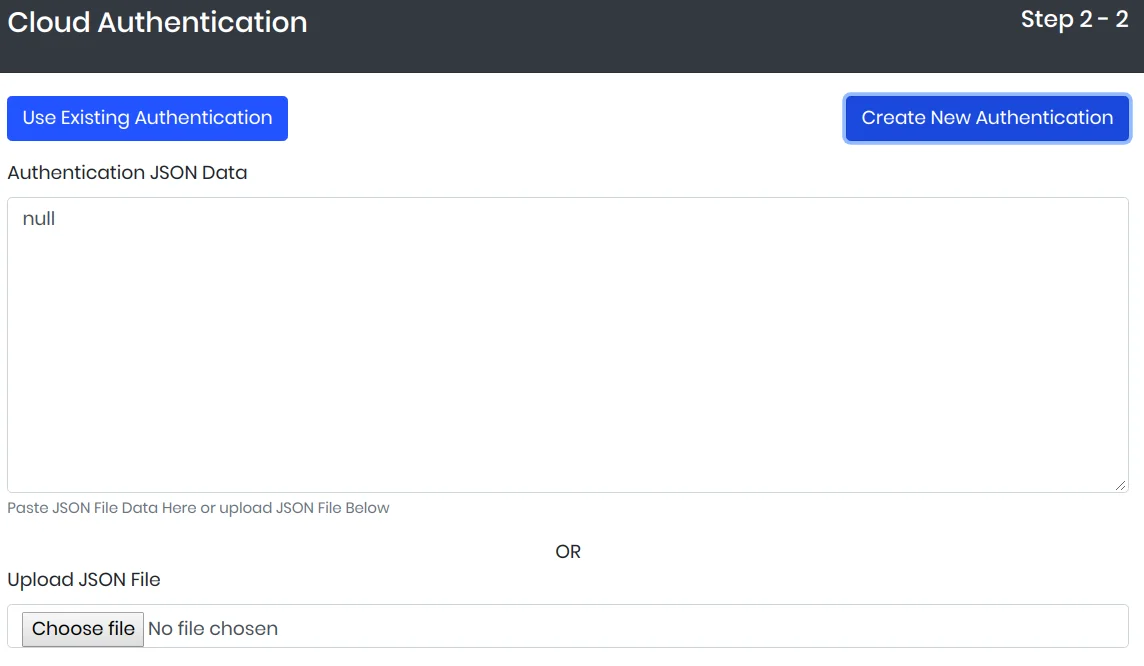
Step – 2: Authentication Form (Second Form)
Here you are presented with two choices: –
1. Use Existing Authentication – If you’ve previously created/imported a cluster using KubeOps or with this Cloud provider, you can click on this button and provide those authentications here.
2. Create New Authentication – Either select a JSON file to upload or enter your authentication data into the text box as JSON payload.
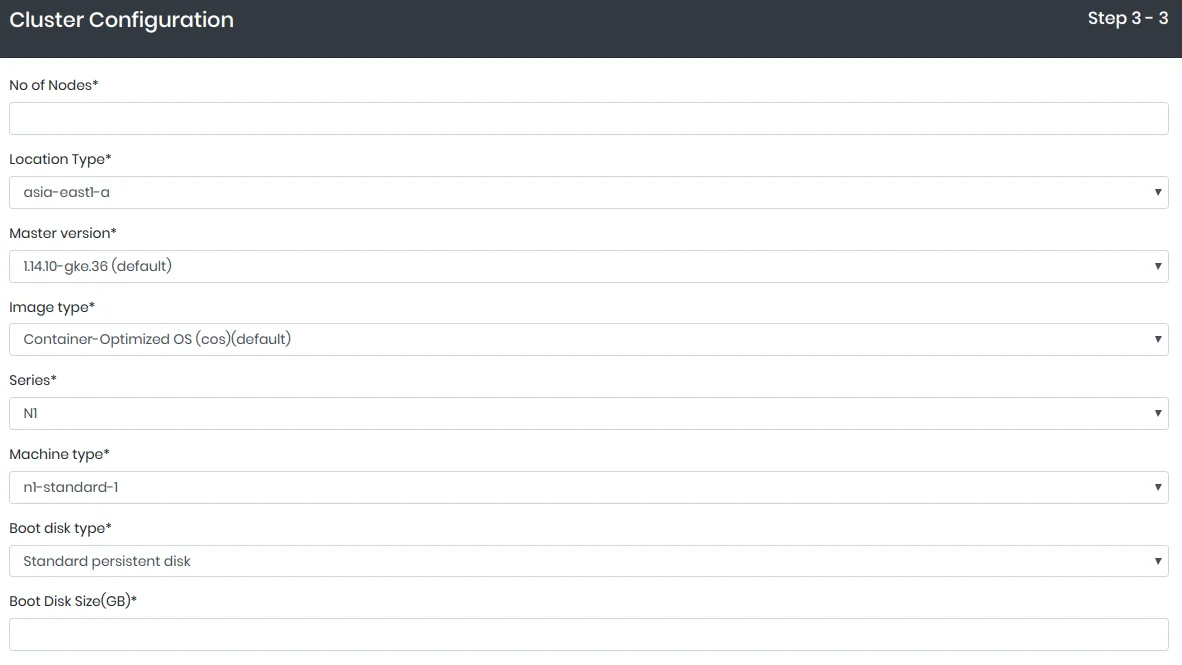
Step – 3: Configuration (Third Form)
In this section, complete the following: –
- Number of Nodes – Enter the Number of nodes to create in the cluster.
- Location – Select the desired location for your cluster.
- Master Version – Choose a Master Version.
- Image Type – Select the desired image.
- Series – Select Series.
- Machine Type – Select Machine Type.
- Boot Disk Type – Select the desired disk type.
- Boot Disk Size – Enter the Boot Disk Size.
2.2 Import your existing Cluster into KubeOps
By entering the details of your existing cluster, these steps will guide you on how to import it into KubeOps.
Step – 1: Basic Form (First Form)
- Enter your existing Cluster Name*
- Choose your preferred Cloud Provider
Step – 2: Authentication Form (Second Form)
Here you have two options: –
3. Use Existing Authentication – If you’ve previously created/imported a cluster using KubeOps with the same cloud provider, you can click on this button and select the cluster whose authentication you would like to use for this cluster. (Same as Create Cluster Authentication Form)
4. Create New Authentication – Either select the JSON file or enter the JSON data into the text box. (Same as Create Cluster Authentication Form)
- Click Submit and your cluster will be imported.
- Cluster Naming Conventions: –
- Cluster Name should be unique for your cloud provider account.
- Cluster Name cannot contain ‘_’.
3. Cloud Application Support
This Section will focus on how KubeOps will install, update and delete Cloud Applications on your cluster.
3.1 Install a Cloud Application
- Cloud Provider* – Select the Cloud Provider.
- Cluster* – Select the desired Cluster*.
- Namespace – Enter the Namespace.
- Repo link – Enter the Repo link of the app.
- App Name – Enter the App Name.
- Click on Select Version and a list of available versions of that app will be displayed
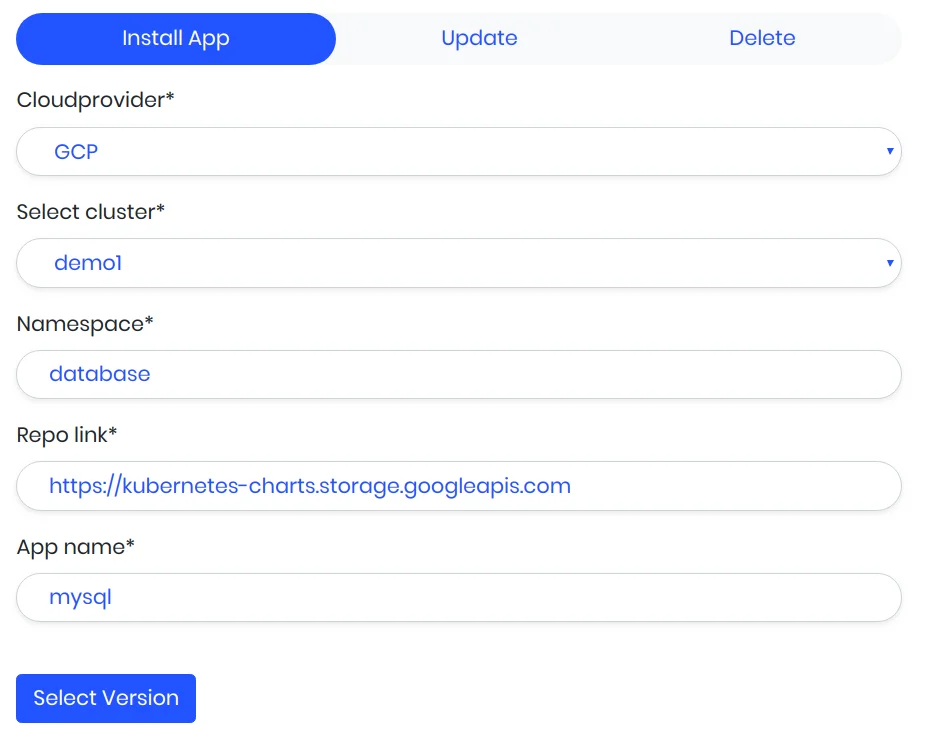
Click install & your desired app will be installed on the choice of your cluster.
3.2 Update an Installed Cloud Application
- Cloud Provider* – Select the Cloud Provider.
- Cluster* – Select the desired Cluster.
- Namespace* – Select the Namespace.
- App Name* – Select the App Name.
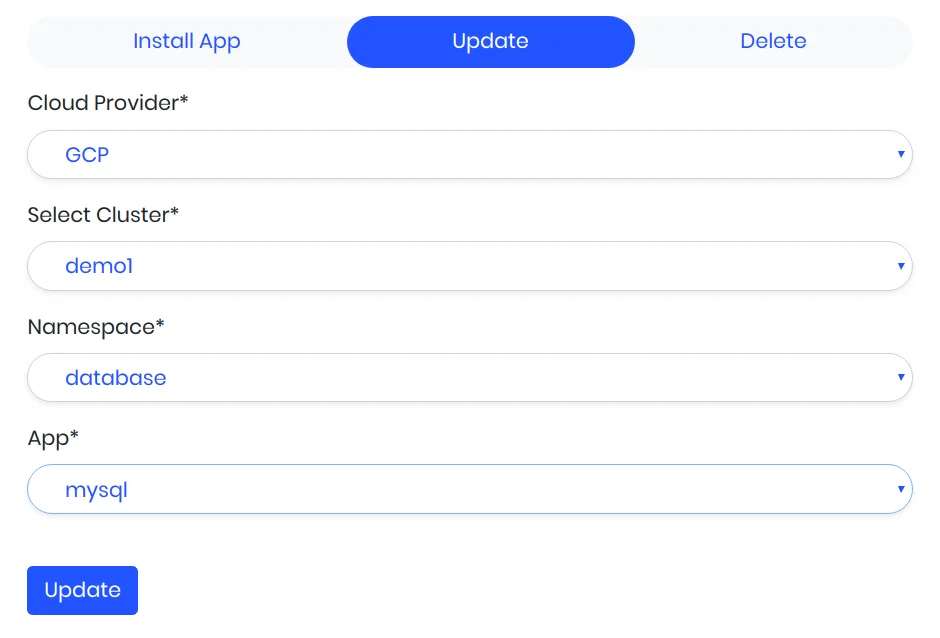
Click update and if there is the latest version available your app will be updated.
3.3 Delete an Installed Cloud Application
- Cloud Provider* – Select the Cloud Provider.
- Cluster* – Select the desired Cluster.
- Namespace* – Select the Namespace.
- App Name* – Select the App Name.
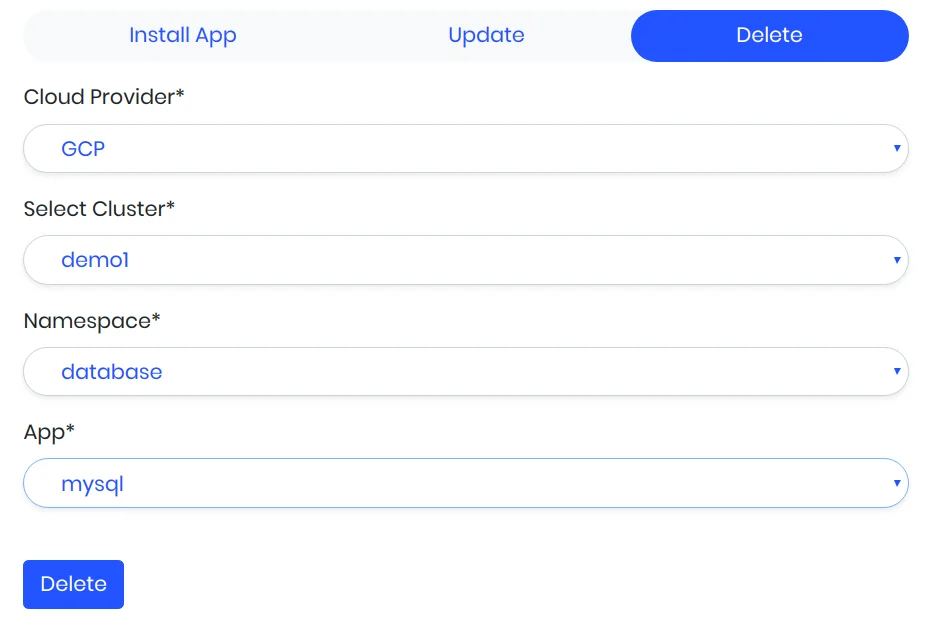
Click delete & your selected app will be deleted.
- Here only those choices will be displayed for which you’ve created/imported the cluster & installed the app using KubeOps.
4. Install the DataVision Application
Enter the following details for DataVision Application : –
- Cluster* – Select the desired Cluster.
- Features – Select the desired feature.
- Share monitoring data – Select your desired choice.
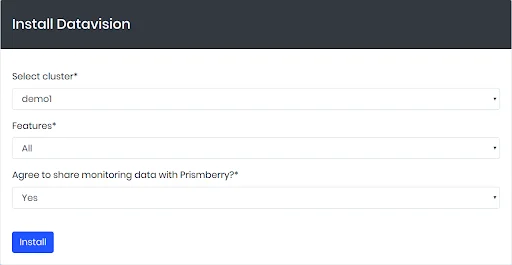
- Here only those choices will be displayed for which you’ve created/imported the cluster & installed the app using KubeOps.
- NOTE: You can also update, and delete the DataVision application as shown in the previous sections.
- Now you are all set up!!